INSTALLATION MADE EASY
If you’ve tackled basic building projects before, you can install WayPost stone siding. There are no special tools needed – chances are you already have everything you need in the garage. WayPost’s masonry-free installation means there is no mortar required, the stones are attached with basic metal fasteners and uniform manufactured stone pieces make sizing simple. It’s never been so easy to make your home look so good.
INSTALLATION 101
- INSTALL STARTER STRIP – Place at the bottom of where the stone is to be applied. Provides a level, solid base for the stone siding installation.
- ATTACH WEATHER RESISTIVE BARRIER (for exterior installations) – We recommend 2 layers of grade D building paper or #15 felt (check local building codes).
- INSTALL STUCCO CASING BEAD (if needed) – Stucco casing bead should be used around windows, doors and vertical transitions.
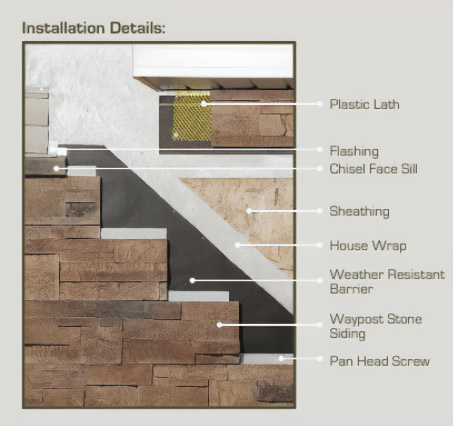
- ATTACH PLASTIC LATH (if needed) – A plastic lath is required for projects using outlet trim pieces, sill pieces under windows or for stone siding ending at a soffit.
- INSTALL ACCESSORIES (if needed) – Using construction adhesive, apply outlet trim pieces or sill pieces under windows.
- INSTALL INSIDE CORNER TRIM – Level the inside corner piece and ensure all inside corner pieces are flush with each other.
- INSTALL OUTSIDE CORNER PIECES – Starting from the outside corners, begin installing corner panels.
- INSTALL FLAT PANELS – Begin at the bottom along an edge, screwing through the holes in the clips on the stone panels into the wall, hitting as many studs as possible. Continue staggering the pieces to avoid having the vertical piece end line up with the course below.
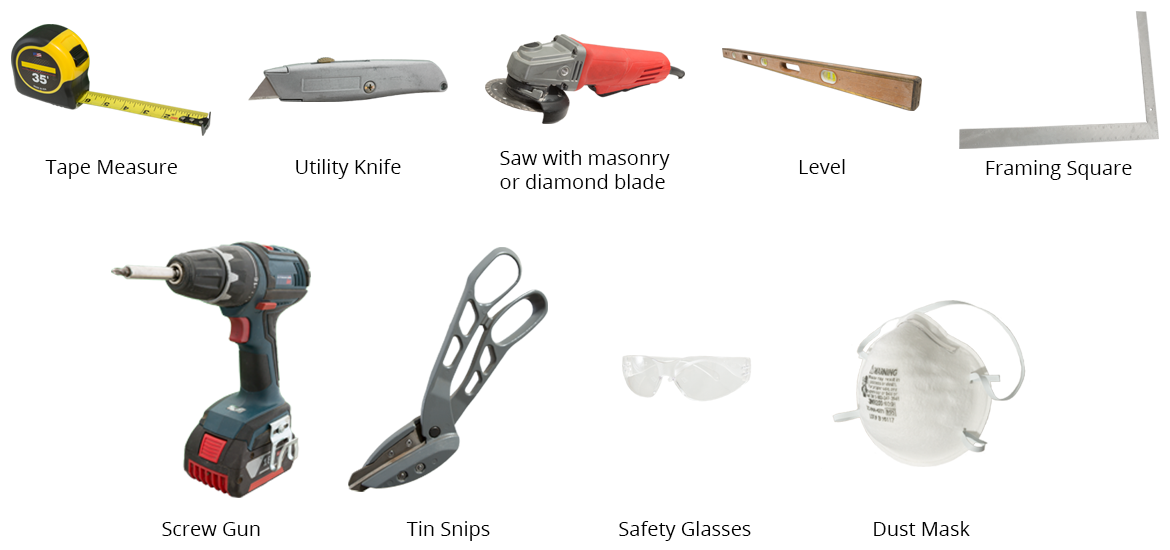
TOOLS FOR THE JOB
MATERIALS NEEDED

TOOLS NEEDED